| Previous | 7.7 Chart templates | Next |
|---|
7.7.3 Example
The example chart template:
[chart]
ylegend=Bits per Second
minimum=1
maximum=30
need_confirm=1
[member_group1]
member_1=F.IN
member_name=<equip> <obj_name>
order=member_name
As you can see the need_confirm value is the same as if it were not there. The maximum value is set this high so that the user may choose from a lot of results (even in case of need_confirm, the given value refers to the number before choosing and not the one after). The steps of template based creation starting from the site:
(The example shows the admin user who can create a chart under the "Customizations=>Public charts" menu item viewable by anyone in the system).
Selecting the template:
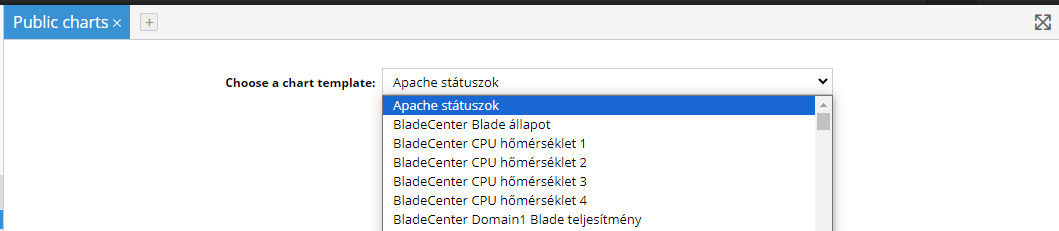
Figure 86. Template based chart creation I.
Specifying the name of the chart:
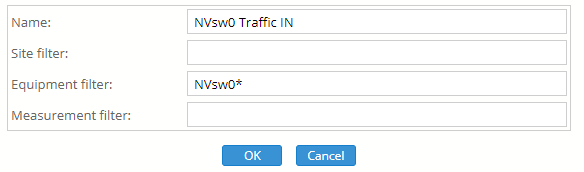
Figure 87. Template based chart creation II.
Next window: the selection of chart members can be seen by the defined measurements. By default all are selected as it is shown by the checkboxes. The creation of member names from the measurement name can also be seen in the figure:
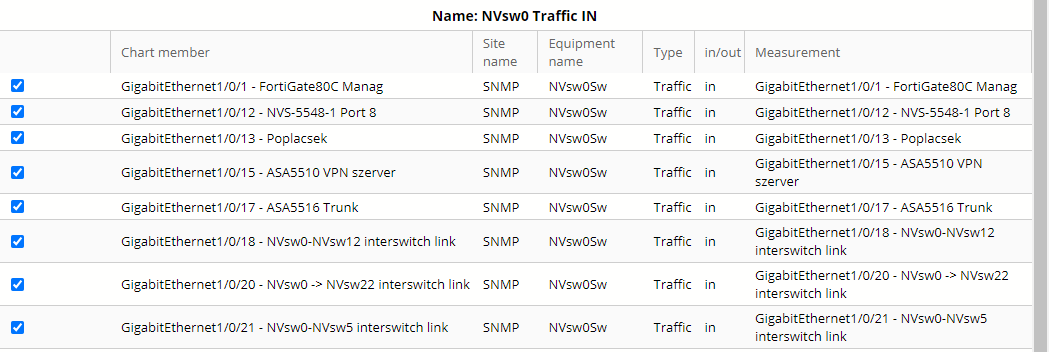
Figure 88. Template based chart creation III.
In the above window by clicking on the "OK" button the chart is saved. The configuration of the saved chart looks like this:
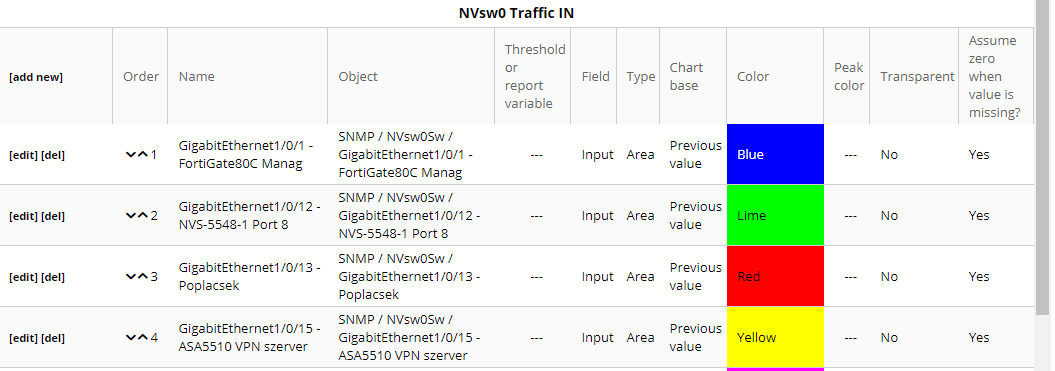
Figure 89. Template based chart creation IV.